WHAT ARE WE DOING
For our final, instead of doing another round of Copy/Synth/Morph, we are going to do an animation.
– It will be a 10-second animation (most of the work will be completed in-class [78 frames – taking a photo every 5 minutes], but some will be out of class [42 frames] to reach this length)
2.5 hours of work time in class Apr 10
2.5 hours of work time in class Apr 12
1.5 hours of work time in class Apr 19
– Your goal is to capture a surrealist moment (something that doesn’t happen in real life, or only happens very rarely); for example, a room floods with water from a faucet and then turns into a fish bowl, or disappearing/reappearing figures, or objects that are impossibly large or small compared with other recognizable objects, etc.)
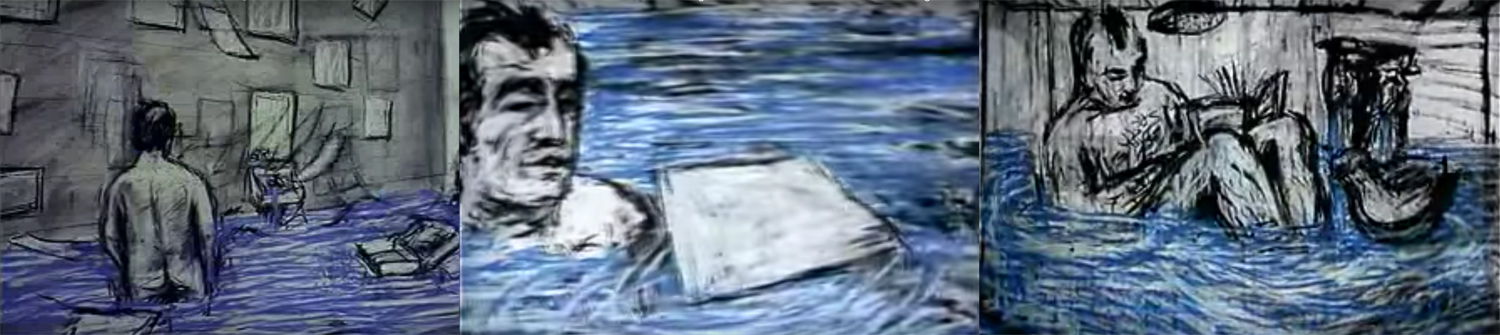
Review William Kentridge’s animation process to help inspire your work
– Your animation should be visually influenced by 2 of the artists from “Artist Reports 4”
– Each animation must have at least 12 frames per second (10 second animation = 120 frames). You can see what that will look like at an animation comparison site like this one.
– Students can use any/all of the 3 media we learned this semester in any combination (colored pencil, oil pastel, chalk pastel)
– In class we will be taking photos of your drawings’ progress at least every 5 minutes (you can work faster than this if you like – this is the minimum speed).
Here are Tips on Creating a Stop Motion Animation: http://www.wikihow.com/Create-a-Stop-Motion-Animation Also, here are 6 Stop Motion Beginner Mistakes (and how to avoid them): http://stopmotionexplosion.com/blogs/blog/6394410-6-stop-motion-beginner-mistakes-and-how-to-avoid-them
WHY ARE WE DOING THIS
Stop-motion animation is good at conveying transformation, change, surprise, and narration. It takes a lot of planning and hard work. This will be excellent practice for the increasing challenge of your projects as you progress through college. Additionally, we will be applying our skills we’ve been practicing all semester: identifying and executing the aspects of other artists’ styles and integrating them into new works.
STEPS:
- Create thumbnail storyboard – at least 1 thumbnail for every second (minimum of 10 thumbnails)
- Create drawings
- Assemble using software we demo in class
GRADING
- Evidence of time invested (specifically meeting the frames requirement via out-of-class work)
- evidence of the 2 artists that influenced you
- Creativity – is this a projects that pushes past the work you’ve previously done?
- adherence to the assignment guidelines

Kallie Lefave, Yellow Submarine Dream, 2010, stop-motion animation, 00:00:35, Music/Sound: The Beatles, animation project for Intermediate Drawing.
Diana Aguilar-Flores, Heart Condition, 2010, stop-motion animation, Music/Sound: “The Album Lear-Outer Banks.” Heather Mahoney, Erode, 2010, stop-motion animation, Music/Sound: Salem, Imogen Heap, and Silver Mount Zion.
Rebecca Fronsee, Whoosh, 2010, stop-motion animation, Music/Sound: Sigur Ros. Stop-motion animation project for Intermediate Drawing, Fall 2010, instructed by Ellen Mueller.
Son Lux Video and Behind the Scenes video
Eran Hilleli – also check out http://vimeo.com/8582455
Marcus Blättermann – cat/mouse animation, great example of home-made sound effects!
Claire Fauché – 7 Colors for the Scents
WHITE BOARD
RSA – Royal Society for the encouragement of Arts, Manufactures and Commerce
DIGITAL APPROACHES
Erin Cosgrove – photoshop mashup technique
ON HUMAN NAILS
Car Commercial
PAPERCUT/COLLAGE
Stacey Steers – collages silent film stills with etchings and drawing
Martha Colburn – Painted photograph animations
Eric Power – does work for Cloud Cult, Jeremy Messersmith
William Kentridge – torn paper used to create shadows
Sarah Holwerda – pretty awesome animation of Beyonce’s “Single Ladies” video
Yuriy Norshteyn – Known for Hedgehog in the Fog, you can read more about his process using glass panes here
ON FOOD
OK Go – animation on toast!
You Can Use One of These Sites:
http://gifmaker.me/ or https://giphy.com/create/slideshow
Step 1: Upload your images to Photoshop.
If you already have images created …
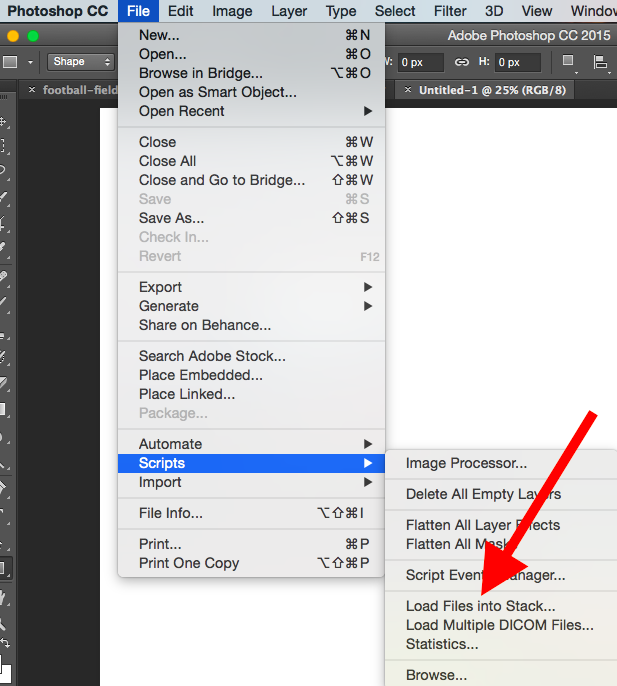
Gather the images you want in a separate folder. To upload them into Photoshop, click File >Scripts > Load Files Into Stack.
Then, select Browse and choose which files you’d like to use in your GIF, then click OK.
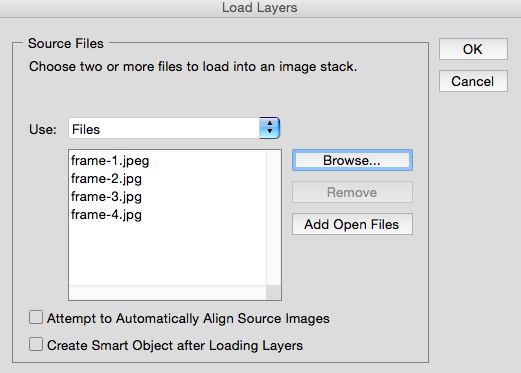
Photoshop will then create a separate layer for each image you’ve selected.
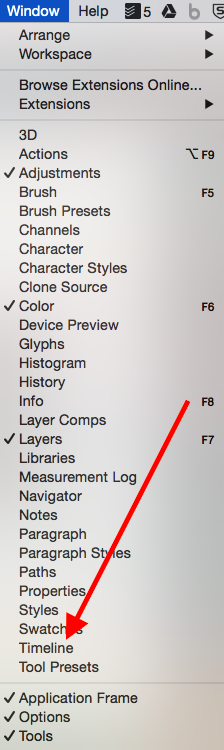
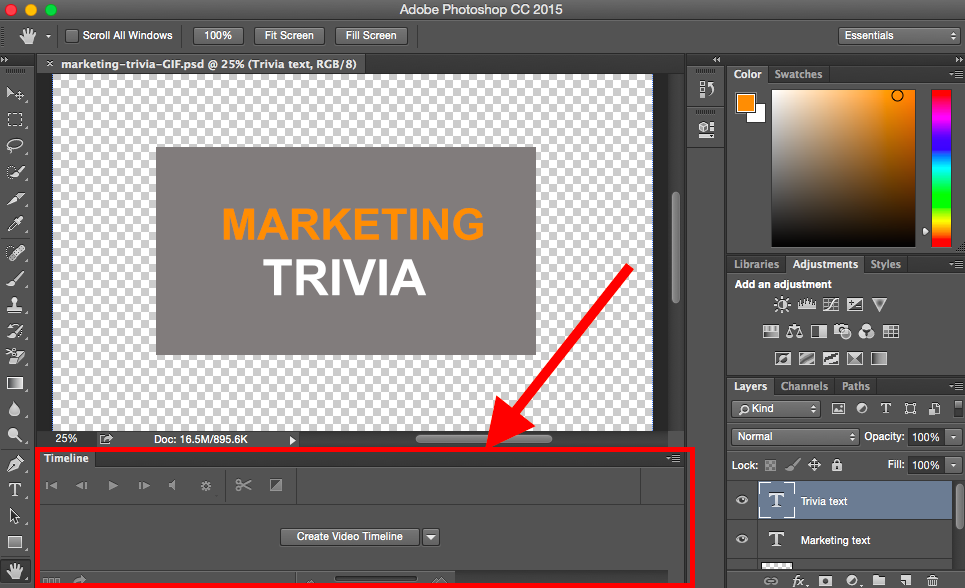
Step 2: Open up the Timeline window.
To open Timeline, go to the top navigation, choose Window > Timeline. The Timeline will let you turn different layers on and off for different periods of time, thereby turning your static image into a GIF.
The Timeline window will appear at the bottom of your screen. Here’s what it looks like:
Step 3: In the Timeline window, click “Create Frame Animation.”
If it’s not automatically selected, choose it from the dropdown menu — but then be sure to actually click it, otherwise the frame animation options won’t show up.
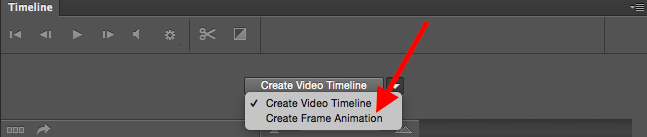
Now, your Timeline should look something like this:

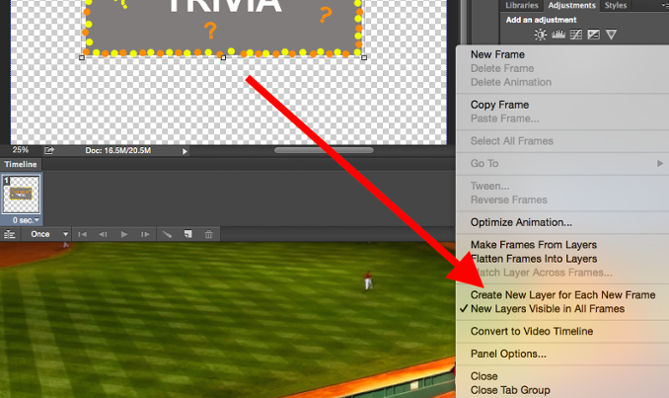
Step 4: Create a new layer for each new frame.
To do this, first select all your layers by going to the top navigation menu and choosing Select > All Layers.
Then, click the menu icon on the right of the Timeline screen.
![]()
From the drop-down menu that appears, choose Create new layer for each new frame.
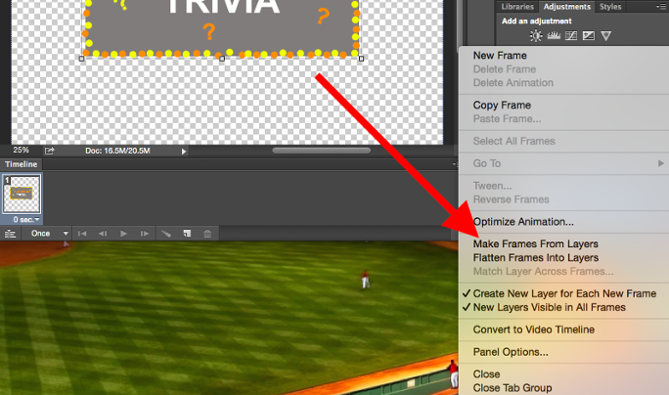
Step 5: Open the same menu icon on the right, and choose “Make Frames From Layers.”
This will make each layer a frame of your GIF.
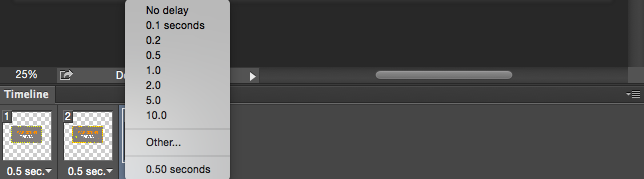
Step 6: Under each frame, select how long it should appear for before switching to the next frame.
To do this, click the time below each frame and choose how long you’d like it to appear. In our case, we chose 0.5 seconds per frame.
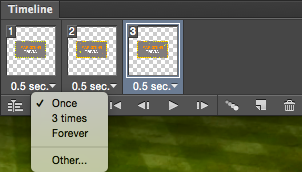
Step 7: At the bottom of the toolbar, select how many times you’d like it to loop.
The default will say Once, but you can loop it as many times as you want, including Forever.Click Other if you’d like to specify a custom number of repetitions.
Step 8: Preview your GIF by pressing the play icon.
![]()
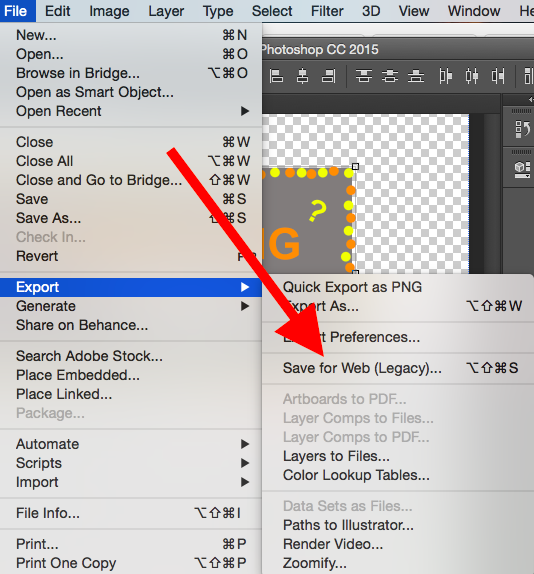
Step 9: Save your GIF to use online.
Satisfied with your GIF? Save it to use online by going to the top navigation bar and clickingFile > Export > Save for Web (Legacy).
Next, choose the type of GIF file you’d like to save it as under the Preset drop-down. If you have a GIF with gradients, choose Dithered GIFs to prevent color banding. If your image employs a lot of solid colors, you may opt for no dither.
The number next to the GIF file determines how large (and how precise) the GIF colors will be compared to the original JPEGs or PNGs. According to Adobe, a higher dithering percentage translates to the appearance of more colors and detail — but it increases the file size.

Click Save at the bottom to save the file to your computer. Now you’re ready to upload this GIF online!
Upload the GIF file into any place online that you’d put an image, and it should play seamlessly. Here’s what the final product might look like:

Have fun, be creative and always EXPERIMENT!
Great Stop-Motion Examples
Between You and Me – an award-winning short shot entirely in stop-motion. Stunning.
Art of Motion – A campy, fun stop-motion by Russell Wyner of the University of Rochester.
Robot Chicken – as seen on Comedy Central. (Warning, may be offensive.)
Brickfilms.com – 100s of directors create stop-motion animations using LEGO bricks.
Stop-motion re-inactment of Space Invaders using people in a theater.
Stop-Motion Software: Mac, Windows, and Linux
Don’t Have a Mac with iMovie? There are a variety of customized apps available to create stop-motion on Mac, Windows, and Linux. Here are a few:
iStopMotion for Mac.
JPGVideo for PC.
Stopmotion for Linux.