Why are we doing this?
Vinyl can be a great alternative drawing media for large walls, elaborate detail, or a project that necessitates strong contrast between the subject and ground. Vinyl is also an excellent medium for letters, numbers, and symbols.
Objectives/Requirements
These drawings must display an interesting composition and effective use of negative space (review your elements and principles of design). Line, edge, and shape will be particularly important, as these elements are very apparent when you are drawing with vinyl. Additionally, we will practice working with a client (in this case, James Moore, who will act as a representative of the Music Department)
Process
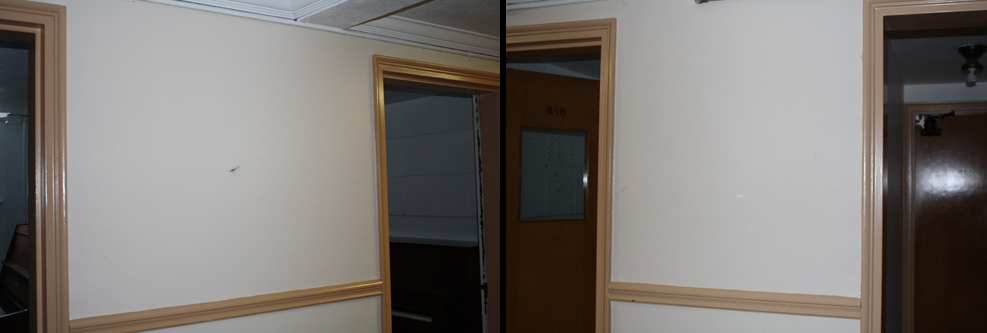
1. Everyone will be assigned a wall between the practice rooms in the basement of Loar hall.

2. Everyone will create a proposal for their wall, which must be approved by Professor James Moore. The proposal must include:
— A large clean sketch of the proposed mural
— An explanation of how it fits the theme of the building (music)
— You must combine a photo/scan of your sketch and the typed explanation into a PDF that you can send to Professor Moore via email.
3. You will calculate how much vinyl you need, and order vinyl for your project online. Students can feel free to share a roll of vinyl if possible.
4. You will draw your proposal in Adobe Illustrator. Make sure you start a new file that has the correct dimensions (Make sure the increments are set to “Inches” rather than points or something else). Enter the height and width of your assigned wall space in the correct fields.
IMPORTANT:
– None of your shapes/lines can be thinner than ⅛” wide. One way to check to see if your lines are too thin, is to go to “View” and then “Rulers,” which makes rulers appear at the top and left of your screen. You can zoom in to compare your drawing to the rulers. Generally, if you think it might be too thin, it probably is. Another way is to click the “Rectangle” tool and hold down the mouse; it will give you the option to select the “Ellipse” tool. You can click on your artboard and a window will pop up asking you how tall/wide you want the ellipse to be. Enter “.125 in” in both fields. It will draw a tiny circle that you can drag around on your screen comparing to all the skinny lines. If the lines are narrower than this little circle, then they are too thin.

– All of your shapes must be closed (no drawing a pair of pants with 3 separate paths/lines – you must OUTLINE the pants creating a single closed shape).
– ONLY USE ONE COLOR (this means only one color – not different shades of black, but only ONE black – or whatever your chosen color is). This means both the stroke and the fill (if you are using them) need to be the same color.
– Simplify anything if necessary. For example, if you’ve used a complicated brush, you may want to simplify the outlines to make weeding the vinyl easier. To simplify, select the object, then go to the “Object” menu, click “Path”, and then select “Simplify”. A menu will appear where you can adjust how simplified you want the object to become.
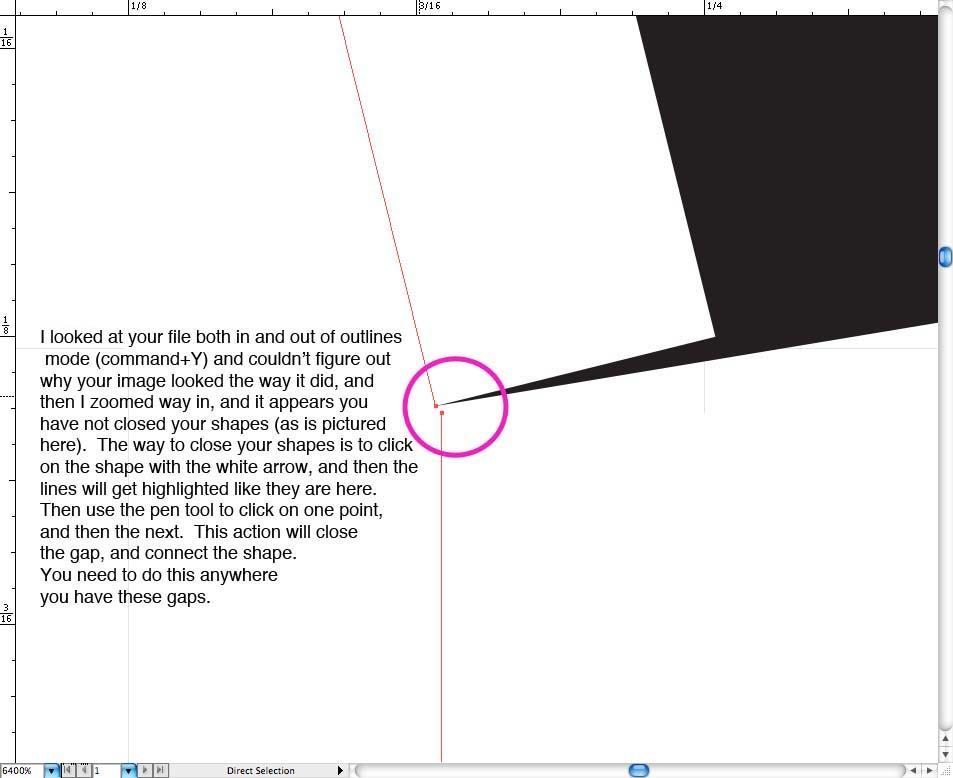
– Make outlines. If you have any lines that utilize a stroke or a brush, this is an especially important step. If you are making text into outlines, select the text, then click the “Type” menu and choose “Create Outlines” to edit the text as an object. If you are making vector-based lines/objects into outlines, select the object, then click the “Object” menu. Click “Path” and “Outline Stroke” to create an outline of the vector object. A good way to CHECK your outlines is to simply do command+Y, which shows you your outlines. Anywhere you see the outlines, that’s where the vinyl cutter is going to cut. To turn off outlines view, simply do command+Y again. (click image below to view larger and read text)
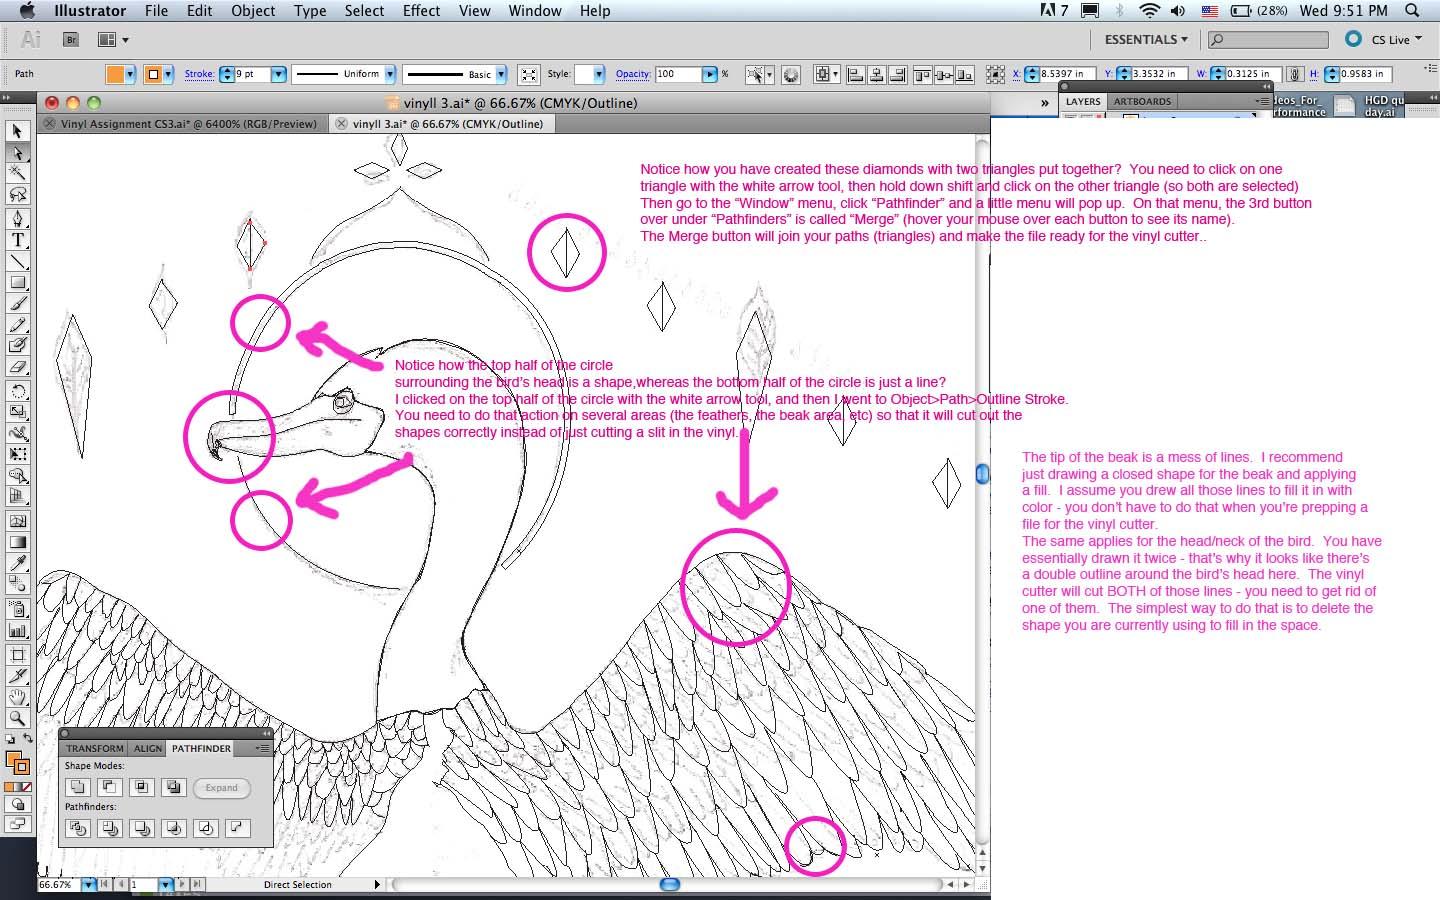
– Merge. Select everything on your artboard. Go to the “Window” menu, click “Pathfinder” and a little menu will pop up. On that menu, the 3rd button over under “Pathfinders” is called “Merge” (hover your mouse over each button to see its name). The Merge button will join all your paths and make the file ready for the vinyl cutter. (click image below to view larger and read text)

– Remember that you can cluster your drawing elements for the purpose of ordering your vinyl as cheaply as possible.
5. Submit your Illustrator file for review/error checking, and sign up for a time to cut out your vinyl.
6. You will cut out your mural using the Cameo Cutter. You will weed the vinyl, apply transfer tape/paper, and apply to the wall.
Grading Criteria
4pt – Quality of correspondence/proposal to Professor Moore
4pt – Craft (how well did you draw in Illustrator, how well did you apply the vinyl)
4pt – How well did you use line, edge, and shape?
4pt – Quality of the overall composition
4pt – creativity/originality (have you thought outside the box in terms of linking to the theme?)
8pt – Written reflection assignment on Blackboard