Self Portrait Photos
Taking these photos might be harder than you think. They have to be high quality crisp images with non-yellow overhead dramatic lighting. No flashes. Light must be coming from primarily above. Head and shoulders only, no body shots. Crisp images only, blurry images will not be allowed. Avoid yellow indoor lighting, try and find a more neutral colored bulb. Feel free to wear hats, make expressions, include hands. No profile shots. We will be painting these slightly smaller than life size and your canvas size must be 16×20, so no cropping. You must paint your head and the space around it – think of the master copy portraits.
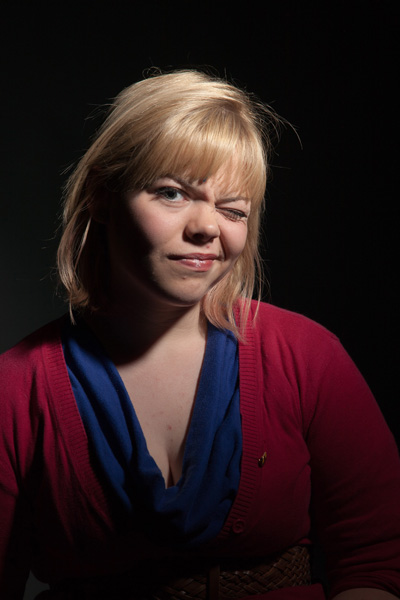
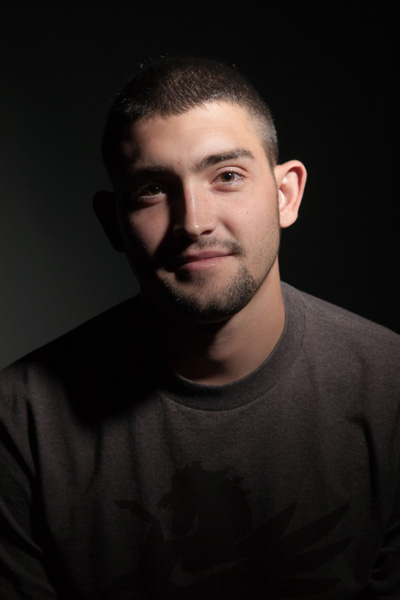
[Samples of good photos]
Your grade will reflect the quality of the image you bring in. The picture that you look the coolest in isn’t necessarily the best image for painting. Part of painting well is choosing quality source material. If you can get with other classmates to set up poses it would be better then doing it alone. When you have narrowed it down to one or two images you can email me those images so we can discuss them. Know that I will probably tell some of you to retake your pictures.


Process
1. Take photo
– one of your eyes should be dominant (it should be the center of interest)
2. Grid your canvas/photo
3. Execute self-portrait in manner similar to the master copy portrait assignment
– remember that highlights are the thickest paint
– soften your lines/keep it very loose/avoid sharp edges
– put color in the shadows (warmer colors usually)
– treat hair as a lump, then a medium bit, and a few highlights