Stretchers/Canvas Demo
This method is the cheapest way to make a canvas. You can also use this method to create panels (hard surface, such as luan/plywood instead of canvas) by skipping the step where you bevel the stretcher pieces at the table saw.
STEP 1: Read Through the “Safety First” Sheet
– emphasize no hoodies, and hair must be pulled back/secured
– show a special set-up [Jig] on the miter saw
– show a special set-up [Jig] on the miter saw
– emphasis on NOT walking behind the table saw
– staying completely focused
– staying completely focused
– emphasis on taking out staples and removing loose knots from boards
– emphasis on never putting yourself at risk
– emphasis on never putting yourself at risk
– 6″ comfort zone around blades
STEP 2: Get Ear/Eye Protection For All
STEP 3: Gather All Necessary Supplies
wood, canvas, pneumatic nail/staple gun, nails/staples, canvas staple gun, square, measuring tape, pencil, air hose, wood glue, wet paper towel, corner clamps
IMPORTANT NOTE: When you buy/find a piece of wood, look for a piece that is NOT warped – it lies flat without any curves, avoid wood that is from the center of a tree, and look for wood that has as few knots as possible.
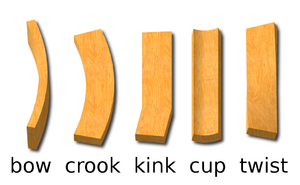
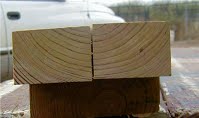

The above image shows various ways wood can warp. The next image shows a board with knots. The third image shows wood from the center of a tree (you can tell by looking at the end of the board – if the rings are near the center of the tree, avoid the board).
It is worth an extra couple bucks to get a really nice piece of clear pine or poplar to make your stretcher.
If you build a stretcher out of cheap warped wood, your canvas will warp.
Also, if you have knots in the wood, your stretcher can break wherever there is a knot.
Also, if you have bad wood, the monitor can refuse to cut it because it can be dangerous.
STEP 4: Table Saw (only specified shop technicians can use the table saw)
– Close the door and turn on the power at the fuse box
– Close the door and turn on the power at the fuse box
– Get the roller-feed support, align it behind the table saw, and lock the wheels.
– Lift and extend the roller-feed support at the far end of the table saw (this will support the wood as it is passed through the table saw)
– Lift and extend the roller-feed support at the far end of the table saw (this will support the wood as it is passed through the table saw)
– Adjust table saw fence (probably to two inches)
– Get a push stick.
– Get a person to catch for you.
– Cut the board into 2″ strips (or whatever width you will be working with).
– Setting one board aside for bracing, the remaining boards need a 45 degree bevel.
– Adjust the blade angle and height. Put bevel on the pieces (work TOWARDS the correct width because about 1/8″ is NOT beveled)STEP 5: Miter Saw
– Adjust the blade angle and height. Put bevel on the pieces (work TOWARDS the correct width because about 1/8″ is NOT beveled)STEP 5: Miter Saw

– Go to miter saw to cut 45 degree angles for the corners.
– Make sure to carefully mark the wood so you cut the correct angle.
– Remember to push in the thumb-lock to use this saw.
– After cutting one side for the stretcher, use that piece of wood to measure the second side.
– Make sure to carefully mark the wood so you cut the correct angle.
– Remember to push in the thumb-lock to use this saw.
– After cutting one side for the stretcher, use that piece of wood to measure the second side.
– Flip the wood upside down to do alternate angles.
STEP 6: Radial Arm Saw
– Make sure blade is down far enough to cut through the wood – use the crank on top.

– Grab the un-beveled piece of wood for the bracing pieces, and cut the end off the board.
– Use the stretchers you just cut to trace a cutting line on the braces. You’ll need one to go across the middle horizontally, and one to go across vertically. (be sure to use the shorter, inner-edge of the stretcher to trace – these braces have to fit INSIDE the frame of the stretcher; and make sure to cut outside the line you’ve drawn, so you don’t cut the board short)
– Use the stretchers you just cut to trace a cutting line on the braces. You’ll need one to go across the middle horizontally, and one to go across vertically. (be sure to use the shorter, inner-edge of the stretcher to trace – these braces have to fit INSIDE the frame of the stretcher; and make sure to cut outside the line you’ve drawn, so you don’t cut the board short)

– Then, find the middle of each brace, and draw a line 1 inch out from the middle in either direction (if you’re using 2″ pieces of wood for the bracing).
– Then, draw the same lines on the inner surfaces of the braces. These lines will help you accurately line up the braces when they are ready to be placed inside the stretcher frame.
– Then, draw the same lines on the inner surfaces of the braces. These lines will help you accurately line up the braces when they are ready to be placed inside the stretcher frame.

– Go to the radial arm saw with two test-pieces of wood (they should be the same width and height as your braces), cut the end off each test-piece, and draw a line at the middle of the endgrain (getting ready for lapjoint)

– Adjust the height of the saw blade and make a cut across both scraps, then check them to see if they flushly fit together, if not, lower the saw a half turn, and keep going until they match up smoothly.

– Once satisfied with the height of the blade, you can take the pieces you have cut as braces, and start taking out the wood for the lap joint

– You can make these cuts slightly spaced out, and then knock out the excess pieces sticking up with another piece of scrap wood.


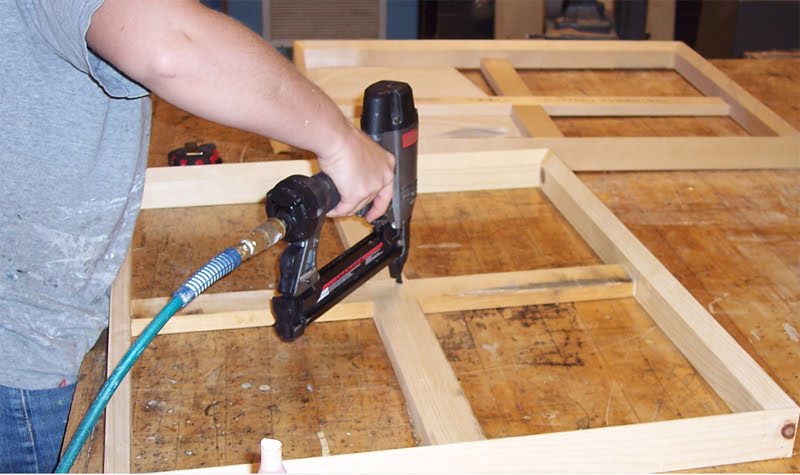
STEP 7: Gluing & Stapling
– Get wood glue, put it on the corner joint (be liberal with glue), and place in a corner clamp.
– Get wood glue, put it on the corner joint (be liberal with glue), and place in a corner clamp.


– Make sure your hands are out of the way as you staple and wear your eye protection (do staples from both sides of corner)


– for the last side you assemble, do BOTH corners at the same time so you can easily apply glue.
– use glue and put the braces within the stretcher frame, and apply 2 staples per brace-end
– use glue and put the braces within the stretcher frame, and apply 2 staples per brace-end


– put 2 short staples in the center of the braces to hold them together
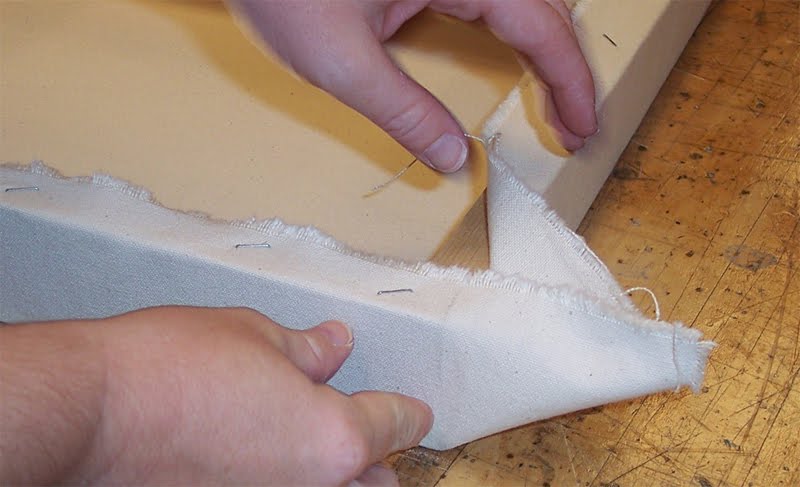
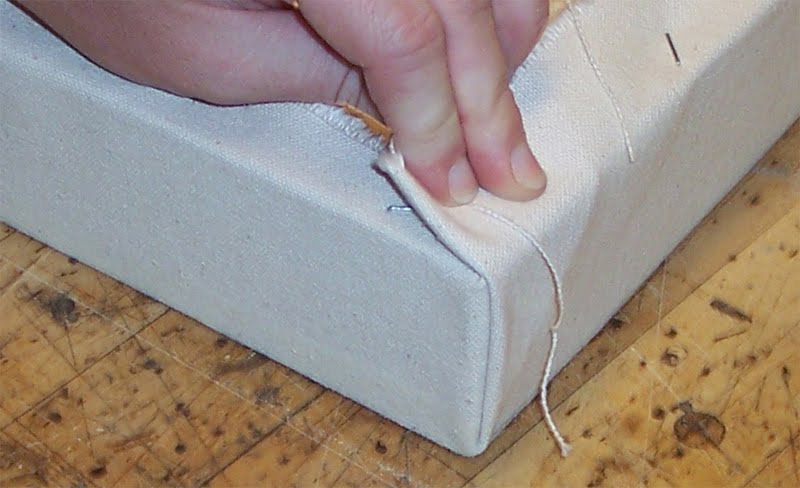
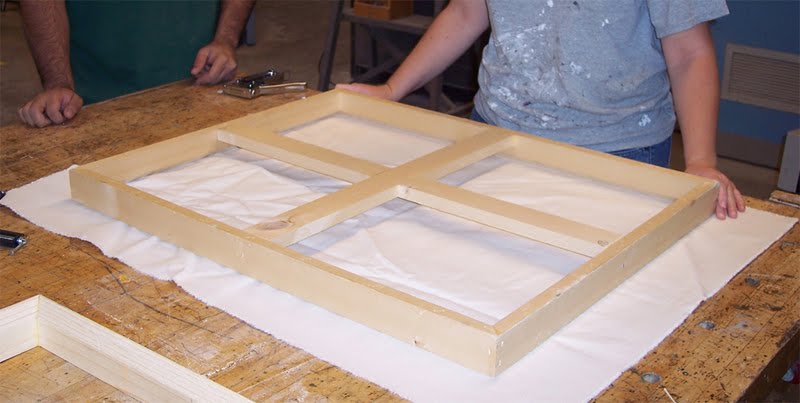
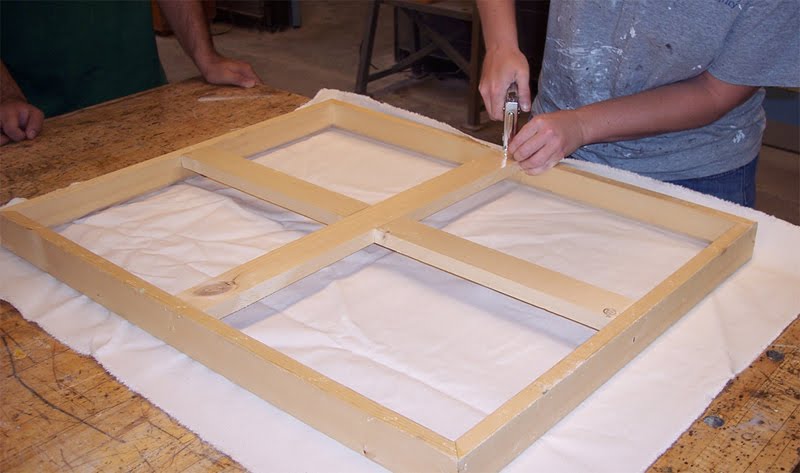
STEP 8: Attaching the Canvas
– get canvas (have about 3″ extra on each side)
– do the centers – the staples should go in at about 45 degrees relative to the edge of the stretcher
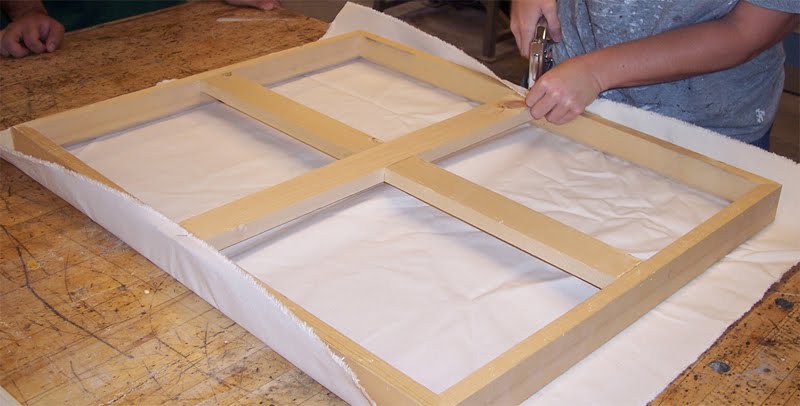
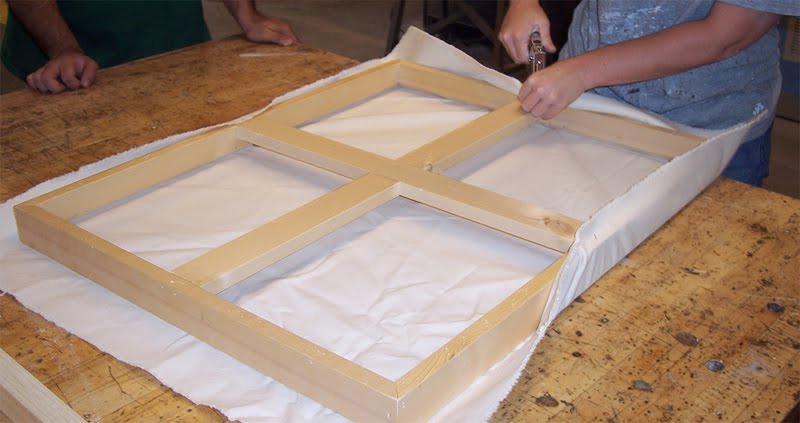
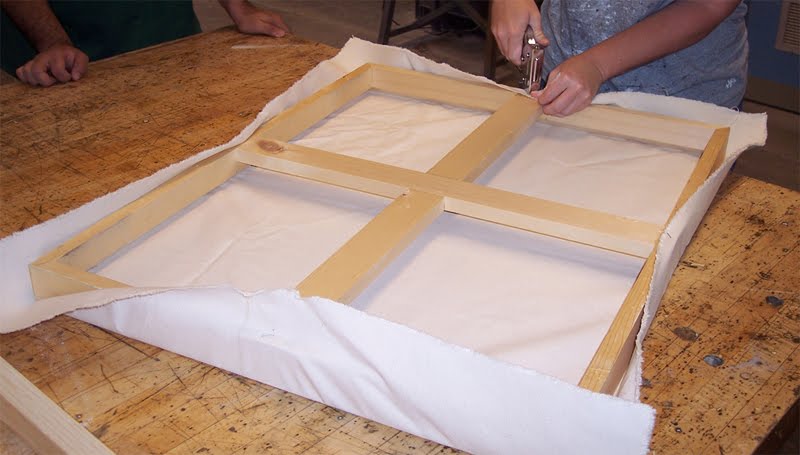
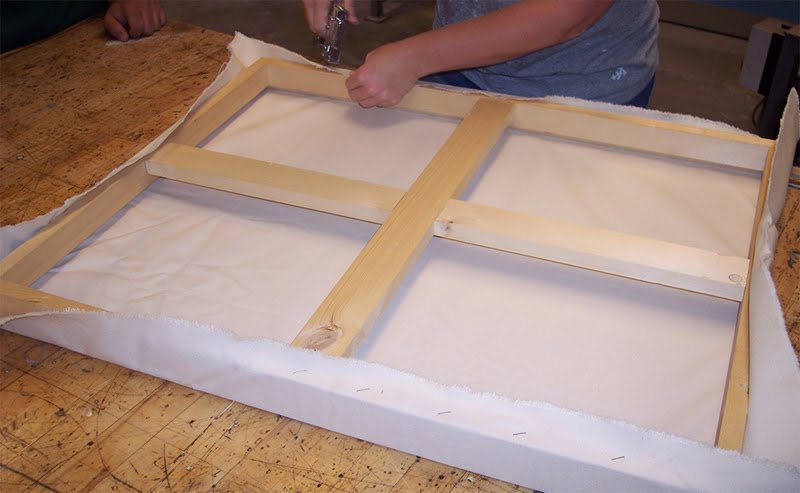
– to do the corners, fold one side over (flat) and then the other side over, so the corner is clean